This is a great article with a lovely video clip.
Category: photography
A Guide to Shooting the Milky Way
This is a wonderful, well written, and comprehensive write-up on taking night photographs (in general) and the Milky Way in particular.
Well worth the 10 minutes to read it through.
https://petapixel.com/2019/03/11/a-guide-to-shooting-the-milky-way/
What I learned photographing a wedding
Recently, I had the opportunity to photograph a wedding. Some background for people reading this (who don’t have the context). The wedding was an “Indian wedding” in San Francisco, CA. It was a hybrid of a traditional North Indian and a South Indian wedding, and was compressed to two hours. There were several events that occurred before the wedding itself, and there were a few after the wedding.
For example, there was a cruise around the San Francisco Bay (thankfully, good weather).

There were also several indoor events (which were conducted in a basement, and  so little natural light). There were several religious ceremonies, a civil ceremony, and lots of food, and drink, and partying as well.
Before heading out to SFO, I read a bunch of stuff about photographing weddings, and I spoke with one person (Thanks Allison) very familiar with this. I took a bunch of gear with me, and I thought long and hard about how to deal with the professional photographer(s) who would also be covering the event.
I was hoping that I’d be able to work alongside them, and watch and learn (and not get in the way). I hoped that they’d not be too annoyed with a busybody with a bunch of gear, and I hoped that I could stay out of their way.
Thinking back, and looking at the pictures I took, I’ve learned a lot; a lot about taking photographs, a lot about myself, and a lot about the equipment that I have.
Shoot fully manual mode – most of the time
Outdoors, it may be possible to get away with auto ISO, but even there shooting anything other than manual focus, manual exposure and aperture is a bad idea. I’ve tried a number of different options for metering, and focus preference, but did not find them to be particularly fun. But, that did mean that I was shooting stopped down (f5.6 or smaller).
Bounce the flash off the roof
I used a Nikon Speedlight SB-700 and if I didn’t bounce it off the roof, the foreground subject got over exposed. Using the diffuser, and bouncing the flash off the roof produced much better results.
You do really want f2.8 a lot of the time!
While I often shot f5.6 or smaller, I did find myself shooting f2.8 quite a lot. Not as much as I thought I would, but certainly quite a lot. And it was good that I had lenses that could go to f2.8. Most of the time I found that I was shooting between 50mm and 90mm so it was quite annoying that I needed two lenses to cover this range. But I managed …
Shoot RAW (+JPEG, but definitely RAW)
I’ve found that many of the pictures I took needed  post-processing that would was much easier with RAW. For example, some of them required significant color (temperature) and exposure adjustment.
One example is at left, I think the color temperature of the picture above is better than the one below. The significant amount of purple in the decorations caused the image to look a little bit too purple for my liking. Luckily the little white altar in the foreground gave me a good color reference.
I don’t want to get into the “can this be done with JPEG” debate; I’m sure that it can, and there are many who prefer JPEG. I just feel lucky that I shot everything RAW+JPEG.
LED Light Panels are a must
I have a great flash, but it is no match for a good LED light panel. I really need to get one of those things if I’m ever going to shoot a wedding, or any other event with a lot of people.
Take more pictures; way more pictures
I’m not a “spray and pray” kind-of person. I tend to look through the view finder a while before clicking. I try to frame a shot well, get everything to look just right, and then the subject has moved, or the ‘moment’ has passed. This happened a lot.
I really have to learn to accept a lower ‘good picture’ ratio, and capture the moment as best as I can, and crop, and post-process later.
Lose a lot of weight
The professionals were at least a hundred pounds lighter than I was. The way they moved clearly reflected a certain difference in our respective ‘momentum’s!
I definitely need more experience with photographing people, something that I’ve known for a while. The wedding was a great excuse for me to happily point a camera at people who were having animated conversations, and click. Now I have to find other venues where I can do the same thing, and learn more about this aspect of photography that I’ve really neglected for too long.
P.S. My thanks to Allison Perkel for all the pointers she gave me before I went on this trip.
How to Use ND Filters Creatively to Make the Most of a Scene
I’ve long known and used ND filters and graduated ND filters in bright light; didn’t realize that you could get some wonderful effects with them in darkness.
The examples in this article (via ) are just outstanding
https://digital-photography-school.com/use-nd-filters-creatively-make-scene/
Like this one of the moon (below).

Here, the “double stacked graduated ND filters” helped bring the brightness of the moon to a level comparable with the foreground.
The takeaway is that ND filters and graduated ND filters can be used in places where there is a huge difference in brightness of the various elements in the photograph.
This is Why ‘Zooming with Your Feet’ Isn’t the Same Thing
“Zooming with your feet” means getting closer to your subject physically instead of relying on a longer lens, but you should be aware that the results you won’t be the same. Here’s a 9-minute video from This Place that looks at how different focal lengths affect perspective when compared to “zooming with your feet.” Perspective distortion is often misunderstood — it’s an area of photography that many photographers may not need to explore or understand properly.
Source: This is Why ‘Zooming with Your Feet’ Isn’t the Same Thing
Cold weather is the best time to look at—and photograph—the night sky
Cold weather is the best time to look at—and photograph—the night sky
5 Tips for Better Concert Photography in Low Light Conditions
I agree with four of the five; I am not so sure about the raise the ISO thing.
https://digital-photography-school.com/5-tips-better-concert-photography-low-light-conditions/
An Advanced Look at Photoshop’s HSL Adjustment Layer Tool
No matter how many articles I read about Photoshop, I always end up learning something new.
This article about HSL is no exception.
https://petapixel.com/2017/07/31/advanced-look-photoshops-hsl-adjustment-layer-tool/
How to Remove People from Your Photos Using Photoshop
This article, “How to Remove People from Your Photos Using Photoshop” first appeared in Digital Photography School.
A very simple, easy tutorial.
https://digital-photography-school.com/remove-people-photos-using-photoshop/
7 Tips for Learning How to See What Your Camera Sees
7 Tips for Learning How to See What Your Camera Sees
From DPS
https://digital-photography-school.com/7-tips-learning-see-what-camera-sees/
How to do Night Photography With No Tripod – and a Little Photoshop Help
This article appeared in digital photography school.
Now I am going to have to try this!
https://digital-photography-school.com/night-photography-without-tripod-photoshop-help/
How to Understand the Curves Tool in Photoshop
Two of the most important things I’ve learned to work with in the past couple of weeks are the Curves Tool in Photoshop (for post processing) and the Histogram tool (either in Photoshop or on your camera itself, for use either while taking pictures, or in post processing).
This article is about the curves tool, well worth the read.
-amrith
After you’ve mastered Levels , it’s time to take a step up to the tool that is probably the most useful for color and contrast control in Photoshop: Curves. As with levels, you should play around with the basic Curves command to get a feel for it.
Primes Versus Zoom Lenses: Which Lens to Use and Why?
Which type of lens is better, a prime lens or a zoom lens? This is one of the most debatable topics in photography. Some of you might choose a zoom lens and others may choose a prime lens, it all depends on what and where you are going to shoot.
Source: Primes Versus Zoom Lenses: Which Lens to Use and Why?
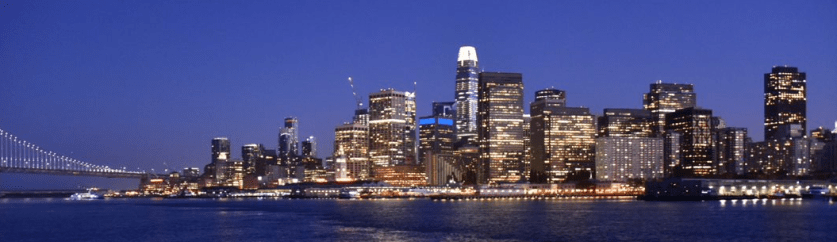
4 Beginner Tips for Doing Architecture Photography
4 Beginner Tips for Doing Architecture Photography http://digital-photography-school.com/4-beginner-tips-for-doing-architecture-photography/
A great article from Digital Photography School. I especially like the picture of the temple at dusk, wonder where that is.
Tips for Shooting the Milky Way
Tips for Shooting the Milky Way
Seeing the Milky Way with your own eyes is what you may call a jaw dropping experience, but one that can be truly achieved only in complete darkness. While stars are visible even in light polluted areas, the Milky Way’s beauty, which is actually caused by concentrations of stars, gas and dust, fades away in the light polluted areas and cannot be seen.
Circular Polarizers Versus Graduated Neutral Density Filters for Landscape Photography
Circular Polarizers Versus Graduated Neutral Density Filters for Landscape Photography
Whether you’re a professional or hobby photographer, odds are you’ve come across a beautiful, scenic landscape, that you absolutely had to photograph. Unless you’re an experienced landscape photographer, there’s a good chance the color in that photo wasn’t as saturated, or balanced as you were expecting. That’s because there’s generally a wide disparity in the dynamic range between the foreground and background of landscapes, as well as between the upper (sky) and lower (earth) halves of the frame. Thanks to a couple of lens filters, this hurdle can easily be overcome without having to spend hours of post-processing in Photoshop.
How and Why to Use Back Button Focus
How and Why to Use Back Button Focus
Common Photography Mistakes Newbies Make and How to Avoid Them
Common Photography Mistakes Newbies Make and How to Avoid Them
Every shooter will tell you that they all made the same photography mistakes when they were starting out. From horizon lines not being straight to poor focusing, here are some of the most common newbie mistakes and how to avoid them.
Continue reading “Common Photography Mistakes Newbies Make and How to Avoid Them”
This is How Light Pollution Affects How We See the Night Sky
This is How Light Pollution Affects How We See the Night Sky
Continue reading “This is How Light Pollution Affects How We See the Night Sky”
6 tips for shooting fall colors
It is almost that time of the year again and that means it is time to start brushing up of the fall color tips and tricks.
6 tips for shooting fall color
https://www.dpreview.com/techniques/4329601714/6-tips-for-shooting-fall-color
Capture Incredible Water Droplet Impacts with a High Speed Camera Rig
Some day, I want to do this! I’ll post some of my attempts at this in a later post.
High speed photography is great for capturing the moment when two water droplets collide and make incredibly beautiful fluid impacts.. Read more on MAKE The post Capture Incredible Water Droplet Impacts with a High Speed Camera Rig appeared first on Make: DIY Projects and Ideas for Makers ..
Source: Capture Incredible Water Droplet Impacts with a High Speed Camera Rig
Stanford Professor puts his entire digital photography course online for free
When it comes to the list of digital imaging pioneers, Marc Levoy is one of those names that belongs right near the top.. His work has led to many of the technical advances that we see in use today with computer generated imagery..
Source: Stanford Professor puts his entire digital photography course online for free
